Wednesday, March 20, 2013

Master Linux Command Line History


1. Display timestamp using HISTTIMEFORMAT

Typically when you type history from command line, it displays the command# and the command. For auditing purpose, it may be beneficial to display the timepstamp along with the command as shown below.
# export HISTTIMEFORMAT='%F %T '
# history | more
1  2008-08-05 19:02:39 service network restart
2  2008-08-05 19:02:39 exit
3  2008-08-05 19:02:39 id
4  2008-08-05 19:02:39 cat /etc/redhat-release

2. Search the history using Control+R

I strongly believe, this may be your most frequently used feature of history. When you’ve already executed a very long command, you can simply search history using a keyword and re-execute the same command without having to type it fully. Press Control+R and type the keyword. In the following example, I searched for red, which displayed the previous command “cat /etc/redhat-release” in the history that contained the word red.
# [Press Ctrl+R from the command prompt,
which will display the reverse-i-search prompt]
(reverse-i-search)`red': cat /etc/redhat-release
[Note: Press enter when you see your command,
which will execute the command from the history]
# cat /etc/redhat-release
Fedora release 9 (Sulphur)
Sometimes you want to edit a command from history before executing it. For e.g. you can search for httpd, which will display service httpd stop from the command history, select this command and change the stop to start and re-execute it again as shown below.
# [Press Ctrl+R from the command prompt,
which will display the reverse-i-search prompt]
(reverse-i-search)`httpd': service httpd stop
[Note: Press either left arrow or right arrow key when you see your
command, which will display the command for you to edit, before executing it]
# service httpd start

3. Repeat previous command quickly using 4 different methods

Sometime you may end up repeating the previous commands for various reasons. Following are the 4 different ways to repeat the last executed command.
  1. Use the up arrow to view the previous command and press enter to execute it.
  2. Type !! and press enter from the command line
  3. Type !-1 and press enter from the command line.
  4. Press Control+P will display the previous command, press enter to execute it

4. Execute a specific command from history

In the following example, If you want to repeat the command #4, you can do !4 as shown below.
# history | more
1  service network restart
2  exit
3  id
4  cat /etc/redhat-release

# !4
cat /etc/redhat-release
Fedora release 9 (Sulphur)

5. Execute previous command that starts with a specific word

Type ! followed by the starting few letters of the command that you would like to re-execute. In the following example, typing !ps and enter, executed the previous command starting with ps, which is ‘ps aux | grep yp’.
# !ps
ps aux | grep yp
root     16947  0.0  0.1  36516  1264 ?        Sl   13:10   0:00 ypbind
root     17503  0.0  0.0   4124   740 pts/0    S+   19:19   0:00 grep yp

6. Control the total number of lines in the history using HISTSIZE

Append the following two lines to the .bash_profile and relogin to the bash shell again to see the change. In this example, only 450 command will be stored in the bash history.
# vi ~/.bash_profile
HISTSIZE=450
HISTFILESIZE=450

7. Change the history file name using HISTFILE

By default, history is stored in ~/.bash_history file. Add the following line to the .bash_profile and relogin to the bash shell, to store the history command in .commandline_warrior file instead of .bash_history file. I’m yet to figure out a practical use for this. I can see this getting used when you want to track commands executed from different terminals using different history file name.
# vi ~/.bash_profile
HISTFILE=/root/.commandline_warrior
If you have a good reason to change the name of the history file, please share it with me, as I’m interested in finding out how you are using this feature.

8. Eliminate the continuous repeated entry from history using HISTCONTROL

In the following example pwd was typed three times, when you do history, you can see all the 3 continuous occurrences of it. To eliminate duplicates, set HISTCONTROL to ignoredups as shown below.
# pwd
# pwd
# pwd
# history | tail -4
44  pwd
45  pwd
46  pwd [Note that there are three pwd commands in history, after
executing pwd 3 times as shown above]
47  history | tail -4

# export HISTCONTROL=ignoredups
# pwd
# pwd
# pwd
# history | tail -3
56  export HISTCONTROL=ignoredups
57  pwd [Note that there is only one pwd command in the history, even after
executing pwd 3 times as shown above]
58  history | tail -4

9. Erase duplicates across the whole history using HISTCONTROL

The ignoredups shown above removes duplicates only if they are consecutive commands. To eliminate duplicates across the whole history, set the HISTCONTROL to erasedups as shown below.
# export HISTCONTROL=erasedups
# pwd
# service httpd stop
# history | tail -3
38  pwd
39  service httpd stop
40  history | tail -3

# ls -ltr
# service httpd stop
# history | tail -6
35  export HISTCONTROL=erasedups
36  pwd
37  history | tail -3
38  ls -ltr
39  service httpd stop
[Note that the previous service httpd stop after pwd got erased]
40  history | tail -6

10. Force history not to remember a particular command using HISTCONTROL

When you execute a command, you can instruct history to ignore the command by setting HISTCONTROL to ignorespace AND typing a space in front of the command as shown below. I can see lot of junior sysadmins getting excited about this, as they can hide a command from the history. It is good to understand how ignorespace works. But, as a best practice, don’t hide purposefully anything from history.
# export HISTCONTROL=ignorespace
# ls -ltr
# pwd
#  service httpd stop [Note that there is a space at the beginning of service,
to ignore this command from history]
# history | tail -3
67  ls -ltr
68  pwd
69  history | tail -3

11. Clear all the previous history using option -c

Sometime you may want to clear all the previous history, but want to keep the history moving forward.
# history -c

12. Subtitute words from history commands

When you are searching through history, you may want to execute a different command but use the same parameter from the command that you’ve just searched.
In the example below, the !!:$ next to the vi command gets the argument from the previous command to the current command.
# ls anaconda-ks.cfg
anaconda-ks.cfg
# vi !!:$
vi anaconda-ks.cfg
In the example below, the !^ next to the vi command gets the first argument from the previous command (i.e cp command) to the current command (i.e vi command).
# cp anaconda-ks.cfg anaconda-ks.cfg.bak
anaconda-ks.cfg
# vi  !^
vi anaconda-ks.cfg

13. Substitute a specific argument for a specific command.

In the example below, !cp:2 searches for the previous command in history that starts with cp and takes the second argument of cp and substitutes it for the ls -l command as shown below.
# cp ~/longname.txt /really/a/very/long/path/long-filename.txt
# ls -l !cp:2
ls -l /really/a/very/long/path/long-filename.txt
In the example below, !cp:$ searches for the previous command in history that starts with cp and takes the last argument (in this case, which is also the second argument as shown above) of cp and substitutes it for the ls -l command as shown below.
# ls -l !cp:$
ls -l /really/a/very/long/path/long-filename.txt

14. Disable the usage of history using HISTSIZE

If you want to disable history all together and don’t want bash shell to remember the commands you’ve typed, set the HISTSIZE to 0 as shown below.
# export HISTSIZE=0
# history
# [Note that history did not display anything]

15. Ignore specific commands from the history using HISTIGNORE

Sometimes you may not want to clutter your history with basic commands such as pwd and ls. Use HISTIGNORE to specify all the commands that you want to ignore from the history. Please note that adding ls to the HISTIGNORE ignores only ls and not ls -l. So, you have to provide the exact command that you would like to ignore from the history.
# export HISTIGNORE="pwd:ls:ls -ltr:"
# pwd
# ls
# ls -ltr
# service httpd stop

# history | tail -3
79  export HISTIGNORE="pwd:ls:ls -ltr:"
80  service httpd stop
81  history
[Note that history did not record pwd, ls and ls -ltr]
Thanks http://www.thegeekstuff.com

Fedora 15 nVidia Drivers Install Guide (disable nouveau driver)

          This guide works with GeForce 6/7/8/9/200/300 series cards and also with GeForce FX cards.           Fedora  nVidia driver installation is not much different from previous Fedora versions. I have tested this guide with a couple computers, so let me know, if you have some problems.


Install nVidia proprietary drivers on Fedora 15 and disable the nouveau driver

1. Change root user

su -
## OR ##
sudo -i

2. Make sure that you are running latest kernel

If not then update kernel and reboot
yum update kernel*
reboot

3. Add RPMFusion Repositories (Free and Non-Free)

32-bit
rpm -Uvh http://download1.rpmfusion.org/free/fedora/development/i386/os/rpmfusion-free-release-15-1.noarch.rpm
rpm -Uvh http://download1.rpmfusion.org/nonfree/fedora/development/i386/os/rpmfusion-nonfree-release-15-1.noarch.rpm
64-bit
rpm -Uvh http://download1.rpmfusion.org/free/fedora/development/x86_64/os/rpmfusion-free-release-15-1.noarch.rpm
rpm -Uvh http://download1.rpmfusion.org/nonfree/fedora/development/x86_64/os/rpmfusion-nonfree-release-15-1.noarch.rpm

4. Install nVidia proprietary drivers

Select 4a. (GeForce 6/7/8/9/200/300/400/500) or 4b. (GeForce FX) depending on your card

4a. Install nVidia proprietary drivers for GeForce 6/7/8/9/200/300/400/500 series cards

Select kmod, kmod-PAE or akmod from following.
kmod-nvidia
yum install kmod-nvidia xorg-x11-drv-nvidia-libs
or
kmod-nvidia-PAE and PAE-kernel devel
yum install kernel-PAE-devel kmod-nvidia-PAE
or
akmod-nvidia
yum install akmod-nvidia xorg-x11-drv-nvidia-libs
akmod is good option and easy way avoid problems on kernel updates and is best and only option if you use:
  • self-compiled kernel
  • older Fedora kernel
  • quickly changing kernels from updates-testing/rawhide
Full spec of kmod and akmod differences, check this.

4b. Install nVidia proprietary drivers for GeForce FX cards

Select kmod, kmod-PAE or akmod from following.
kmod-nvidia
yum install kmod-nvidia-173xx xorg-x11-drv-nvidia-173xx-libs.i686
or
kmod-nvidia-PAE and PAE-kernel devel
yum install kernel-PAE-devel kmod-nvidia-173xx-PAE
or
akmod-nvidia
yum install akmod-nvidia-173xx xorg-x11-drv-nvidia-173xx-libs.i686
akmod is good option and easy way avoid problems on kernel updates and is best and only option if you use:
  • self-compiled kernel
  • older Fedora kernel
  • quickly changing kernels from updates-testing/rawhide
Full spec of kmod and akmod differences, check this.

Install Eclipse SDK 4.2.1 (Juno) on Fedora 18/17, CentOS/RHEL 6.3/5.8


This is guide, howto install latest Eclipse SDK 4.2.1 (Juno) on FedoraCentOS and Red Hat (RHEL). This guide should work with Fedora 18/17/16/15/14/13/12, CentOS 6.3/6.2/6.1/6/5.8 and Red Hat (RHEL) 6.3/6.2/6.1/6/5.8 and even with earlier versions.
Eclipse is a multi-language software development environment comprising an integrated development environment (IDE) and an extensible plug-in system. It is written primarily in Java and can be used to develop applications in Java and, by means of various plug-ins, other languages including C,C++COBOLPythonPerlPHPScala and Ruby (including Ruby on Rails framework).

Install Eclipse SDK 4.2.1 (Juno) on Fedora 18/17, CentOS/Red Hat (RHEL) 6.3/5.8

1. Install Sun/Oracle Java JDK 7 or Java JDK 6

2. Download Eclipse SDK 4.2.1 (Juno)

Download suitable version from www.eclipse.org/downloads. This guide uses Eclipse Classic 4.2.1 version. Another popular versions are Eclipse IDE for Java EE DevelopersEclipse IDE for Java Developers and Eclipse for PHP Developers. Select also 32-bit or 64-bit version depending on your system.

3. Change root user

su -
## OR ##
sudo -i

4. Extract Eclipse package (example to /opt directory)

## x86 - 32-bit ##
tar -xvzf eclipse-SDK-4.2.1-linux-gtk.tar.gz -C /opt
 
## x86_64 - 64-bit ##
tar -xvzf eclipse-SDK-4.2.1-linux-gtk-x86_64.tar.gz -C /opt

5. Add read permissions to all files

chmod -R +r /opt/eclipse

6. Create Eclipse executable on /usr/bin path

touch /usr/bin/eclipse
chmod 755 /usr/bin/eclipse
 
## Open eclipse file with your favourite editor ##
nano -w /usr/bin/eclipse
 
## Paste following content to file ##
#!/bin/sh
export ECLIPSE_HOME="/opt/eclipse"
 
$ECLIPSE_HOME/eclipse $*

7. Create Gnome desktop launcher

## Create following file, with our favourite editor ##
/usr/share/applications/eclipse.desktop
 
## Add following content to file and save ##
[Desktop Entry]
Encoding=UTF-8
Name=Eclipse
Comment=Eclipse SDK 4.2.1
Exec=eclipse
Icon=/opt/eclipse/icon.xpm
Terminal=false
Type=Application
Categories=GNOME;Application;Development;
StartupNotify=true

8. Start Eclipse 4.2.1

From command line use eclipse command
eclipse
From Desktop menu Gnome 3 Eclipse 4.2.1
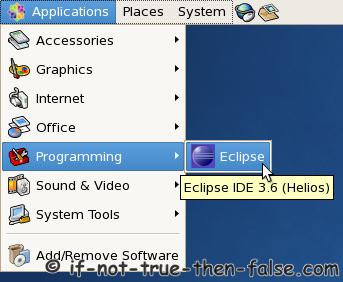
Fedora 15 Applications Programming Eclipse
From Desktop menu Gnome 2 and Eclipse 3.6 (Helios)
Eclipse SDK 3.6.2 Launcher Gnome

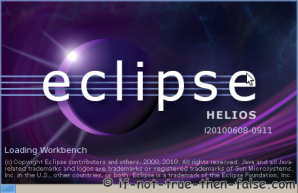
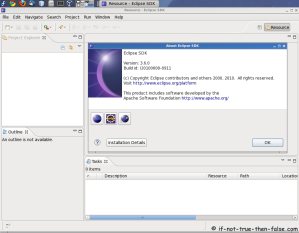
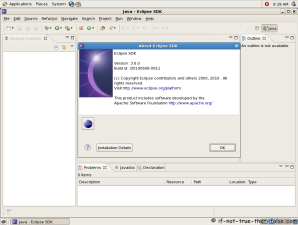
9. Eclipse 3.6 screenshots, running (and starting) on Fedora 13 32-bit and CentOS 5.5 64-bit

Eclipse loading
Eclipse SDK 3.6 Loading on CentOS
Eclipse 3.6 running on Fedora 13 32-bit
Eclipse SDK 3.6 Running on Fedora 13
Eclipse 3.6 running on CentOS 5.5 64-bit
Eclipse SDK 3.6 Running on CentOS

Troubleshooting

If you get something like following errors:

Failed to load the JNI shared library /usr/java/jdk1.6.0_21/jre/bin/../lib/i386/client/libjvm.so
Or
/usr/java/jdk1.6.0_21/jre/bin/../lib/i386/client/libjvm.so: cannot enable executable stack as shared object requires: Permission denied
Then do following:
chcon -t execmem_exec_t '/opt/eclipse/eclipse'

Thursday, March 14, 2013

Bugzilla Installation In CentOS


Bugzilla Installation In CentOS


Bugzilla is a “Defect Tracking System” or “Bug-Tracking System” that allows individual or groups of developers to keep track of outstanding bugs in their product effectively.
In this tutorial we’ll install Bugzilla in CentOS 5.


1.- Prerequisites.

  • Basic Knowledge of Linux Shell Commands.
  • Download latest version of Bugzilla. You can download it here.

2.- Install Perl.

Before installing Perl, check if it’s already installed with the following command.
#perl -v
If you see the following output Perl is properly installed in your machine.
This is perl, v5.8.8 built for i386-linux-thread-multi
 
Copyright 1987-2006, Larry Wall
 
Perl may be copied only under the terms of either the Artistic License or the
GNU General Public License, which may be found in the Perl 5 source kit.
 
Complete documentation for Perl, including FAQ lists, should be found on
this system using "man perl" or "perldoc perl". If you have access to the
Internet, point your browser at http://www.perl.org/, the Perl Home Page.
Otherwise you have to install Perl running this command:
#yum install perl

3.- Install MySQL.

Maybe you want to install MySQL as Yum Group Installation to get all the available packages including the server, the client, python and perl libraries. First run the following command to check the availability:
#yum grouplist | grep -i mysql
   MySQL Database
Then run this command to check what is inside the “MySQL Database” Bundle:
#yum groupinfo "MySQL Database"
 
Loaded plugins: fastestmirror, security
Setting up Group Process
Loading mirror speeds from cached hostfile
* base: mirror.nsc.liu.se
* extras: mirror.nsc.liu.se
* updates: centosx4.centos.org
 
Group: MySQL Database
Description: This package group contains packages useful for use with MySQL.
Mandatory Packages:
mysql
Default Packages:
MySQL-python
libdbi-dbd-mysql
mysql-connector-odbc
mysql-server
perl-DBD-MySQL
unixODBC
Optional Packages:
mod_auth_mysql
mysql-bench
mysql-connector-odbc64
mysql-devel
php-mysql
qt-MySQL
As you can see, this bundle installs all additional packages that maybe you will want to add in the future. (If you want to restrict the installation to just certain packages, this list is useful too).
Install ”MySQL Database” Bundle
#yum groupinstall "MySQL Database"
Start the MySQL Service.
#service mysqld start
Change the root password.
#mysql -u root
 
Welcome to the MySQL monitor. Commands end with ; or \g.
Your MySQL connection id is 4
Server version: 5.0.95 Source distribution
 
Copyright (c) 2000, 2011, Oracle and/or its affiliates. All rights reserved.
 
Oracle is a registered trademark of Oracle Corporation and/or its
affiliates. Other names may be trademarks of their respective
owners.
 
Type 'help;' or '\h' for help. Type '\c' to clear the current input statement.
 
mysql> select host, user from mysql.user;
+-----------------------+------+
| host | user |
+-----------------------+------+
| 127.0.0.1 | root | 
| localhost | | 
| localhost | root | 
| localhost.localdomain | | 
| localhost.localdomain | root | 
+-----------------------+------+
5 rows in set (0.00 sec)
 
mysql> set password for 'root'@'localhost' = PASSWORD('your_password_here');
Query OK, 0 rows affected (0.00 sec)
 
mysql> set password for 'root'@'127.0.0.1' = PASSWORD('your_password_here');
Query OK, 0 rows affected (0.00 sec)

4.- MySQL post installation activities.

Once you have MySQL installed, you need to do the next steps that are listed in the Bugzilla’s documentation to avoid errors in runtime.
Update /etc/my.cnf file with the following lines in the [mysqld] section:
max_allowed_packet=4M
ft_min_word_len=2
Create a database and its user named bugs as follows:
mysql -u root -p
mysql>create database bugs;
mysql>grant all privileges on bugs.* to bugs@localhost identified by 'bugs_password';
mysql> flush privileges;
Restart MySQL service:
#service mysqld restart

5.- Install Apache.

To install Apache you just have to run the following command as root:
#yum install httpd mod_ssl
This will install Apache in its latest version with SSL suppport.

6.- Check dependencies before installing Bugzilla.

Copy Bugzilla tar file to /var/www/html/ directory.
#cp bugzilla-4.2.4.tar.gz /var/www/html/
Extract the bugzilla-4.2.4.tar.gz file
#tar xvfz bugzilla-4.2.4.tar.gz
Run the bugzilla checksetup.pl command to check if the required and optional modules are available.
# cd bugzilla-4.2.4
# ./checksetup.pl --check-modules
* This is Bugzilla 4.2.4 on perl 5.8.8
* Running on Linux 2.6.18-308.24.1.el5 #1 SMP Tue Dec 4 17:42:30 EST 2012
 
Checking perl modules...
Checking for CGI.pm (v3.51) ok: found v3.62
Checking for Digest-SHA (any) not found
Checking for TimeDate (v2.21) not found
Checking for DateTime (v0.28) not found
Checking for DateTime-TimeZone (v0.71) not found
Checking for DBI (v1.41) ok: found v1.52
Checking for Template-Toolkit (v2.22) not found
Checking for Email-Send (v2.00) not found
Checking for Email-MIME (v1.904) not found
Checking for URI (v1.37) found v1.35
Checking for List-MoreUtils (v0.22) not found
Checking for Math-Random-ISAAC (v1.0.1) not found
 
Checking available perl DBD modules...
Checking for DBD-Pg (v1.45) not found
Checking for DBD-mysql (v4.001) found v3.0007
Checking for DBD-SQLite (v1.29) not found
Checking for DBD-Oracle (v1.19) not found
 
The following Perl modules are optional:
Checking for GD (v1.20) not found
Checking for Chart (v2.1) not found
Checking for Template-GD (any) not found
Checking for GDTextUtil (any) not found
Checking for GDGraph (any) not found
Checking for MIME-tools (v5.406) not found
Checking for libwww-perl (any) ok: found v2.033
Checking for XML-Twig (any) not found
Checking for PatchReader (v0.9.6) not found
Checking for perl-ldap (any) not found
Checking for Authen-SASL (any) not found
Checking for RadiusPerl (any) not found
Checking for SOAP-Lite (v0.712) not found
Checking for JSON-RPC (any) not found
Checking for JSON-XS (v2.0) not found
Checking for Test-Taint (any) not found
Checking for HTML-Parser (v3.40) ok: found v3.55
Checking for HTML-Scrubber (any) not found
Checking for Encode (v2.21) found v2.12
Checking for Encode-Detect (any) not found
Checking for Email-MIME-Attachment-Stripper (any) not found
Checking for Email-Reply (any) not found
Checking for TheSchwartz (any) not found
Checking for Daemon-Generic (any) not found
Checking for mod_perl (v1.999022) not found
Checking for Apache-SizeLimit (v0.96) not found
Checking for mod_headers (any) ok
Checking for mod_expires (any) ok
Checking for mod_env (any) ok
***********************************************************************
* REQUIRED MODULES *
***********************************************************************
* Bugzilla requires you to install some Perl modules which are either *
* missing from your system, or the version on your system is too old. *
* See below for commands to install these modules. *
***********************************************************************
* DATABASE ACCESS *
***********************************************************************
* In order to access your database, Bugzilla requires that the *
* correct "DBD" module be installed for the database that you are *
* running. See below for the correct command to run to install the *
* appropriate module for your database. *
***********************************************************************
* OPTIONAL MODULES *
***********************************************************************
* Certain Perl modules are not required by Bugzilla, but by *
* installing the latest version you gain access to additional *
* features. *
* *
* The optional modules you do not have installed are listed below, *
* with the name of the feature they enable. Below that table are the *
* commands to install each module. *
***********************************************************************
* MODULE NAME * ENABLES FEATURE(S) *
***********************************************************************
* GD * Graphical Reports, New Charts, Old Charts *
* Chart * New Charts, Old Charts *
* Template-GD * Graphical Reports *
* GDTextUtil * Graphical Reports *
* GDGraph * Graphical Reports *
* MIME-tools * Move Bugs Between Installations *
* XML-Twig * Move Bugs Between Installations, Automatic Update Notifications *
* PatchReader * Patch Viewer *
* perl-ldap * LDAP Authentication *
* Authen-SASL * SMTP Authentication *
* RadiusPerl * RADIUS Authentication *
* SOAP-Lite * XML-RPC Interface *
* JSON-RPC * JSON-RPC Interface *
* JSON-XS * Make JSON-RPC Faster *
* Test-Taint * JSON-RPC Interface, XML-RPC Interface *
* HTML-Scrubber * More HTML in Product/Group Descriptions *
* Encode * Automatic charset detection for text attachments *
* Encode-Detect * Automatic charset detection for text attachments *
* Email-MIME-Attachment-Stripper * Inbound Email *
* Email-Reply * Inbound Email *
* TheSchwartz * Mail Queueing *
* Daemon-Generic * Mail Queueing *
* mod_perl * mod_perl *
* Apache-SizeLimit * mod_perl *
***********************************************************************
COMMANDS TO INSTALL OPTIONAL MODULES:
 
GD: /usr/bin/perl install-module.pl GD
Chart: /usr/bin/perl install-module.pl Chart::Lines
Template-GD: /usr/bin/perl install-module.pl Template::Plugin::GD::Image
GDTextUtil: /usr/bin/perl install-module.pl GD::Text
GDGraph: /usr/bin/perl install-module.pl GD::Graph
MIME-tools: /usr/bin/perl install-module.pl MIME::Parser
XML-Twig: /usr/bin/perl install-module.pl XML::Twig
PatchReader: /usr/bin/perl install-module.pl PatchReader
perl-ldap: /usr/bin/perl install-module.pl Net::LDAP
Authen-SASL: /usr/bin/perl install-module.pl Authen::SASL
RadiusPerl: /usr/bin/perl install-module.pl Authen::Radius
SOAP-Lite: /usr/bin/perl install-module.pl SOAP::Lite
JSON-RPC: /usr/bin/perl install-module.pl JSON::RPC
JSON-XS: /usr/bin/perl install-module.pl JSON::XS
Test-Taint: /usr/bin/perl install-module.pl Test::Taint
HTML-Scrubber: /usr/bin/perl install-module.pl HTML::Scrubber
Encode: /usr/bin/perl install-module.pl Encode
Encode-Detect: /usr/bin/perl install-module.pl Encode::Detect
Email-MIME-Attachment-Stripper: /usr/bin/perl install-module.pl Email::MIME::Attachment::Stripper
Email-Reply: /usr/bin/perl install-module.pl Email::Reply
TheSchwartz: /usr/bin/perl install-module.pl TheSchwartz
Daemon-Generic: /usr/bin/perl install-module.pl Daemon::Generic
mod_perl: /usr/bin/perl install-module.pl mod_perl2
Apache-SizeLimit: /usr/bin/perl install-module.pl Apache2::SizeLimit
 
YOU MUST RUN ONE OF THE FOLLOWING COMMANDS (depending on which database
you use):
 
PostgreSQL: /usr/bin/perl install-module.pl DBD::Pg
MySQL: /usr/bin/perl install-module.pl DBD::mysql
SQLite: /usr/bin/perl install-module.pl DBD::SQLite
Oracle: /usr/bin/perl install-module.pl DBD::Oracle
 
COMMANDS TO INSTALL REQUIRED MODULES (You *must* run all these commands
and then re-run checksetup.pl):
 
/usr/bin/perl install-module.pl Digest::SHA
/usr/bin/perl install-module.pl Date::Format
/usr/bin/perl install-module.pl DateTime
/usr/bin/perl install-module.pl DateTime::TimeZone
/usr/bin/perl install-module.pl Template
/usr/bin/perl install-module.pl Email::Send
/usr/bin/perl install-module.pl Email::MIME
/usr/bin/perl install-module.pl URI
/usr/bin/perl install-module.pl List::MoreUtils
/usr/bin/perl install-module.pl Math::Random::ISAAC
 
To attempt an automatic install of every required and optional module
with one command, do:
 
/usr/bin/perl install-module.pl --all
 
*** Installation aborted. Read the messages above. ***
 
#
#
As you can see there are many libraries that are not installed, so don’t be scared and execute the following command:
# /usr/bin/perl install-module.pl --all
After waiting for a while you may want to run bugzilla checksetup.pl command again to check if all the libraries have been installed.
# ./checksetup.pl --check-modules
* This is Bugzilla 4.2.4 on perl 5.8.8
* Running on Linux 2.6.18-308.24.1.el5 #1 SMP Tue Dec 4 17:42:30 EST 2012
 
Checking perl modules...
Checking for CGI.pm (v3.51) ok: found v3.62
Checking for Digest-SHA (any) ok: found v5.80
Checking for TimeDate (v2.21) ok: found v2.24
Checking for DateTime (v0.28) ok: found v0.78
Checking for DateTime-TimeZone (v0.71) ok: found v1.56
Checking for DBI (v1.41) ok: found v1.623
Checking for Template-Toolkit (v2.22) ok: found v2.24
Return::Value is deprecated at lib/Return/Value.pm line 13
require Return/Value.pm called at lib/Email/Send.pm line 11
Email::Send::BEGIN() called at lib/Return/Value.pm line 0
eval {...} called at lib/Return/Value.pm line 0
require Email/Send.pm called at (eval 70) line 1
eval 'require Email::Send;' called at Bugzilla/Install/Requirements.pm line 668
Bugzilla::Install::Requirements::have_vers('HASH(0xa4f2310)', 1) called at Bugzilla/Install/Requirements.pm line 445
Bugzilla::Install::Requirements::_check_missing('ARRAY(0xa4c3d48)', 1) called at Bugzilla/Install/Requirements.pm line 409
Bugzilla::Install::Requirements::check_requirements(1) called at ./checksetup.pl line 86
Checking for Email-Send (v2.00) ok: found v2.198
Checking for Email-MIME (v1.904) ok: found v1.911
Checking for URI (v1.37) ok: found v1.60
Checking for List-MoreUtils (v0.22) ok: found v0.33
Checking for Math-Random-ISAAC (v1.0.1) ok: found v1.004
 
Checking available perl DBD modules...
Checking for DBD-Pg (v1.45) not found
Checking for DBD-mysql (v4.001) found v3.0007
Checking for DBD-SQLite (v1.29) ok: found v1.37
Checking for DBD-Oracle (v1.19) not found
 
The following Perl modules are optional:
Checking for GD (v1.20) not found
Checking for Chart (v2.1) not found
Checking for Template-GD (any) not found
Checking for GDTextUtil (any) not found
Checking for GDGraph (any) not found
Checking for MIME-tools (v5.406) ok: found v5.503
Checking for libwww-perl (any) ok: found v6.04
Checking for XML-Twig (any) not found
Checking for PatchReader (v0.9.6) ok: found v0.9.6
Checking for perl-ldap (any) ok: found v0.52
Checking for Authen-SASL (any) ok: found v2.16
Checking for RadiusPerl (any) ok: found v0.22
Checking for SOAP-Lite (v0.712) ok: found v0.715
Checking for JSON-RPC (any) ok: found v1.03
Checking for JSON-XS (v2.0) ok: found v2.33
Checking for Test-Taint (any) ok: found v1.06
Checking for HTML-Parser (v3.40) ok: found v3.55
Checking for HTML-Scrubber (any) ok: found v0.09
Checking for Encode (v2.21) ok: found v2.47
Checking for Encode-Detect (any) not found
Checking for Email-MIME-Attachment-Stripper (any) ok: found v1.316
Checking for Email-Reply (any) ok: found v1.202
Checking for TheSchwartz (any) ok: found v1.10
Subroutine File::Slurp::O_RDWR redefined at lib/File/Slurp.pm line 11
Subroutine File::Slurp::O_CREAT redefined at lib/File/Slurp.pm line 11
Subroutine File::Slurp::O_EXCL redefined at lib/File/Slurp.pm line 11
Checking for Daemon-Generic (any) ok: found v0.82
Checking for mod_perl (v1.999022) not found
Checking for Apache-SizeLimit (v0.96) not found
Checking for mod_headers (any) ok
Checking for mod_expires (any) ok
Checking for mod_env (any) ok
***********************************************************************
* OPTIONAL MODULES *
***********************************************************************
* Certain Perl modules are not required by Bugzilla, but by *
* installing the latest version you gain access to additional *
* features. *
* *
* The optional modules you do not have installed are listed below, *
* with the name of the feature they enable. Below that table are the *
* commands to install each module. *
***********************************************************************
* MODULE NAME * ENABLES FEATURE(S) *
***********************************************************************
* GD * Graphical Reports, New Charts, Old Charts *
* Chart * New Charts, Old Charts *
* Template-GD * Graphical Reports *
* GDTextUtil * Graphical Reports *
* GDGraph * Graphical Reports *
* XML-Twig * Move Bugs Between Installations, Automatic Update Notifications *
* Encode-Detect * Automatic charset detection for text attachments *
* mod_perl * mod_perl *
* Apache-SizeLimit * mod_perl *
***********************************************************************
COMMANDS TO INSTALL OPTIONAL MODULES:
 
GD: /usr/bin/perl install-module.pl GD
Chart: /usr/bin/perl install-module.pl Chart::Lines
Template-GD: /usr/bin/perl install-module.pl Template::Plugin::GD::Image
GDTextUtil: /usr/bin/perl install-module.pl GD::Text
GDGraph: /usr/bin/perl install-module.pl GD::Graph
XML-Twig: /usr/bin/perl install-module.pl XML::Twig
Encode-Detect: /usr/bin/perl install-module.pl Encode::Detect
mod_perl: /usr/bin/perl install-module.pl mod_perl2
Apache-SizeLimit: /usr/bin/perl install-module.pl Apache2::SizeLimit
To attempt an automatic install of every required and optional module
with one command, do:
 
#/usr/bin/perl install-module.pl --all
#
At this point the command installed all the libraries it could, but there are some libraries that couldn’t be installed because of the dependencies that the libraries might need. So you’ll need to install them one by one before continuing.
At the end of the post I’ve added a Missing Libraries Installation Section to cover those problems.

7.- Check dependencies once again.

If you have all the missing libraries already installed run checksetup.pl again just to be sure everything is OK.
#./checksetup.pl --check-modules
 
* This is Bugzilla 4.2.4 on perl 5.8.8
* Running on Linux 2.6.18-308.24.1.el5 #1 SMP Tue Dec 4 17:42:30 EST 2012
 
Checking perl modules...
Checking for CGI.pm (v3.51) ok: found v3.62
Checking for Digest-SHA (any) ok: found v5.80
Checking for TimeDate (v2.21) ok: found v2.24
Checking for DateTime (v0.28) ok: found v0.78
Checking for DateTime-TimeZone (v0.71) ok: found v1.56
Checking for DBI (v1.41) ok: found v1.623
Checking for Template-Toolkit (v2.22) ok: found v2.24
Return::Value is deprecated at lib/Return/Value.pm line 13
require Return/Value.pm called at lib/Email/Send.pm line 11
Email::Send::BEGIN() called at lib/Return/Value.pm line 0
eval {...} called at lib/Return/Value.pm line 0
require Email/Send.pm called at (eval 71) line 1
eval 'require Email::Send;' called at Bugzilla/Install/Requirements.pm line 668
Bugzilla::Install::Requirements::have_vers('HASH(0x9c54198)', 1) called at Bugzilla/Install/Requirements.pm line 445
Bugzilla::Install::Requirements::_check_missing('ARRAY(0x9c27140)', 1) called at Bugzilla/Install/Requirements.pm line 409
Bugzilla::Install::Requirements::check_requirements(1) called at ./checksetup.pl line 86
Checking for Email-Send (v2.00) ok: found v2.198
Checking for Email-MIME (v1.904) ok: found v1.911
Checking for URI (v1.37) ok: found v1.60
Checking for List-MoreUtils (v0.22) ok: found v0.33
Checking for Math-Random-ISAAC (v1.0.1) ok: found v1.004
 
Checking available perl DBD modules...
Checking for DBD-Pg (v1.45) not found
Checking for DBD-mysql (v4.001) ok: found v4.022
Checking for DBD-SQLite (v1.29) ok: found v1.37
Checking for DBD-Oracle (v1.19) not found
 
The following Perl modules are optional:
Checking for GD (v1.20) ok: found v2.46
Checking for Chart (v2.1) ok: found v2.4.6
Checking for Template-GD (any) ok: found v1.56
Checking for GDTextUtil (any) ok: found v0.86
Checking for GDGraph (any) ok: found v1.44
Checking for MIME-tools (v5.406) ok: found v5.503
Checking for libwww-perl (any) ok: found v6.04
Checking for XML-Twig (any) ok: found v3.42
Checking for PatchReader (v0.9.6) ok: found v0.9.6
Checking for perl-ldap (any) ok: found v0.52
Checking for Authen-SASL (any) ok: found v2.16
Checking for RadiusPerl (any) ok: found v0.22
Checking for SOAP-Lite (v0.712) ok: found v0.715
Checking for JSON-RPC (any) ok: found v1.03
Checking for JSON-XS (v2.0) ok: found v2.33
Checking for Test-Taint (any) ok: found v1.06
Checking for HTML-Parser (v3.40) ok: found v3.55
Checking for HTML-Scrubber (any) ok: found v0.09
Checking for Encode (v2.21) ok: found v2.47
Checking for Encode-Detect (any) ok: found v1.00
Checking for Email-MIME-Attachment-Stripper (any) ok: found v1.316
Checking for Email-Reply (any) ok: found v1.202
Checking for TheSchwartz (any) ok: found v1.10
Subroutine File::Slurp::O_RDWR redefined at lib/File/Slurp.pm line 11
Subroutine File::Slurp::O_CREAT redefined at lib/File/Slurp.pm line 11
Subroutine File::Slurp::O_EXCL redefined at lib/File/Slurp.pm line 11
Checking for Daemon-Generic (any) ok: found v0.82
Checking for mod_perl (v1.999022) ok: found v2.000004
Checking for Apache-SizeLimit (v0.96) ok: found v0.96
Checking for mod_headers (any) ok
Checking for mod_expires (any) ok
Checking for mod_env (any) ok

8.- Install Bugzilla.

Run ./checksetup.pl once again but this time without any argument to create the ./localconfig file in which we have to change some options to configure MySQL as the DB Server.
#./checksetup.pl
Update ./localconfig file changing the following lines:
$db_driver = 'mysql';
$db_host = 'localhost';
$db_user = 'bugs';
$db_pass = 'your_password';
Then run ./checksetup.pl for the last time, in this occasion the database will be created and the admin user information is requested:
Looks like we don't have an administrator set up yet. Either this is
 
your first time using Bugzilla, or your administrator's privileges
might have accidentally been deleted.
 
Enter the e-mail address of the administrator: contact@marcotello.com
Enter the real name of the administrator: Marco Tello
Enter a password for the administrator account:
Please retype the password to verify:
contact@marcotello.com is now set up as an administrator.
Creating initial dummy product 'TestProduct'...
 
Now that you have installed Bugzilla, you should visit the 'Parameters'
page (linked in the footer of the Administrator account) to ensure it
is set up as you wish - this includes setting the 'urlbase' option to
the correct URL.
checksetup.pl complete.

9.- Bugzilla post installation activities.

Go to /var/www/html directory.
#cd /var/www/html
Delete bugzilla-4.2.4.tar.gz file to save space.
#rm -rf bugzilla-4.2.4.tar.gz
Move bugzilla-4.2.4 directory to a folder called just bugzilla.
#mv bugzilla-4.2.4 bugzilla
Make apache user the owner of bugzilla directory
#chown -R apache:apache bugzilla
Configure MySQL to accept larger attachments in bugs database:
#mysql -u bugs -p
mysql> use bugs
mysql> ALTER TABLE attachments AVG_ROW_LENGTH=1000000, MAX_ROWS=20000;

10.- Configure Apache to run Bugzilla.

Create a file named bugzilla.conf in /etc/httpd/conf.d/ directory with the following content:
<Directory "/var/www/html/bugzilla">
   AddHandler cgi-script .cgi
   Options +Indexes +ExecCGI
   DirectoryIndex index.cgi
   AllowOverride Limit FileInfo Indexes
</Directory>
Restart Apache.
#service httpd restart

11.- Run Bugzilla.

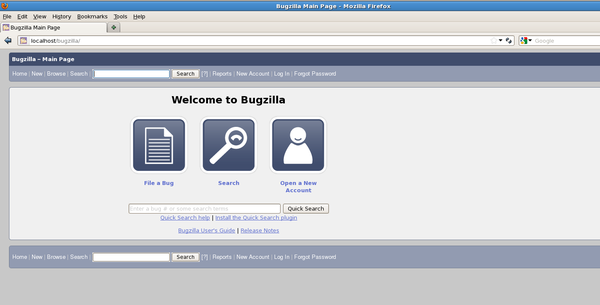
Open a browser and go to http://localhost/bugzilla.
That’s it, Bugzilla is up and running.

12.- Missing Libraries Installation Section.

DBD-mysql (v4.001) is missing

The DBD-mysql (v4.001) is missing
Solution: install mysql-dlevel library.
To set up properly DBD-mysql (v4.001) you need to install mysql-devel first. Run the following command:
#yum install mysql-devel
Once installed run the following command:
#/usr/bin/perl install-module.pl DBD::mysql

Can’t install GD (v1.20).

There’s an option to install GD when we get the following error:
#/usr/bin/perl install-module.pl GD
 
**UNRECOVERABLE ERROR**
Could not find gdlib-config in the search path. Please install libgd 2.0.28 or higher.
If you want to try to compile anyway, please rerun this script with the option --ignore_missing_gd.
Solution: install gd-level package.
#yum install gd-devel
then run the following command to install GD:
#/usr/bin/perl install-module.pl GD

XML-Twig is missing.

The XML-Twig library is missing. It doesn’t matter how many times you want to run:
#/usr/bin/perl install-module.pl XML::Twig
XML-Twig will not be installed in your system.
Solution: install XML Twig via yum.
Just run the following command:
#yum install perl-XML-Twig

Encode::Detect is missing.

This library is hard to find in the repositories, the best option is to install it manually. You can download the rpm here.
Solution: install manually perl-Encode-Detect rpm.
#rpm -Uvh perl-Encode-Detect-1.00-1.el5.rf.i386.rpm

mod_perl is missing.

mod_per is not installed in your computer.
Solution: install mod_perl via yum.
#yum install mod_perl
#yum install mod_perl-devel

Can’t install Apache2::SizeLimit.

When you try to install Apache Size Limit it returns the following error:
#Can't find the mod_perl include dir (reason: path /usr/include/httpd doesn't exist) at /usr/lib/perl5/vendor_perl/5.8.8/i386-linux-thread-multi/Apache2/Build.pm line 2030.

Solution: create the /usr/include/httpd directory.

#mkdir /usr/include/httpd

#/usr/bin/perl install-module.pl Apache2::SizeLimit


Installing Testopia

Download Testopia Required version from the following link

ftp://ftp.mozilla.org/pub/mozilla.org/webtools/testopia/
untar this tar ball in the 

[root@ bugzilla]# cd /var/www/html/bugzilla/

[root@ bugzilla]# tar xvfz /root/testopia-2.5-BUGZILLA-4.2.tar.gz 

For lower version # patch -p0 -i extensions/Testopia/patch-3.6.1 (exceute this command)

For 4.x.x series Not required

Finally

[root@bugzilla]# ./checksetup.pl

The above command will list out the required dependancies. Please follow it to complete the configuraiton.

After the completion, http://<IP-ADDRESS>/bugzilla will show the bugzilla login page.  Once you login, it will give a link for testopia.


Reference: 

Following link contains complete steps to install Testopia.

https://wiki.mozilla.org/Testopia:README

Following link contains Bugzilla Guide.  This guide have complete installation steps and how to use Bugzilla. 

http://www.bugzilla.org/docs/3.6/en/pdf/Bugzilla-Guide.pdf

This document will not cover MTA (Mail Transfer Agent).  Installing sendmail will help you to trigger emails from Bugzilla.